Plinth siding finish
The plinth has to withstand heavy loads, atmospheric and mechanical, therefore it is one of the most vulnerable parts of the house. A plinth needs protection and siding is one way to do this. If you do not take any measures, the foundation can collapse under the influence of melt water or deform due to temperature changes.
Consequently, basement siding protects not only the basement itself, but also the foundation and load-bearing walls of the house. Moreover, they can be used to revet part of the facade or the entire facade as a whole.
Modern panels of this variety are made from polypropylene-based resins. The composition also contains substances that improve the performance of siding. Thanks to these components, the facing material becomes more resistant to mechanical stress, durable, frost and heat resistant.
The color scheme of the basement siding panels is varied. In texture and pattern, they repeat the stone or brickwork. Recently, basement siding made under a wooden shingle began to gain popularity. Such a wide selection of textures and shades gives room for design imagination. The cladding can be made from siding of any one color or create a composition of two or more shades.
Conscientious manufacturers
Conscientious manufacturers produce very high quality imitation. Visually, cladding with basement siding is practically impossible to distinguish from real stone and brick. You can determine the material only by sound, by knocking on the base.
The reason for this lies in the technology of production of basement siding. As a basis, they take a fragment of a wall made of the material for which it is planned to style the basement siding. An impression is taken from the wall and a mold is made from it. Material is poured into it under pressure. After hardening, a panel is obtained, on the surface of which the texture of the original is imprinted down to the smallest cracks.
To make the similarity absolute, the siding is painted appropriately.
Meanwhile, the difference in price between basement siding and natural facing materials is significant: installation costs 2 – 5 times cheaper.
Siding of the same variety, of the same manufacturer, with the same pattern may differ markedly in thickness and shade depending on the series of issue. Therefore, when purchasing accessories, make sure that they are suitable for your series of row panels.
As for the color of the panels and components, everything is not so simple here. If ordinary panels have a slightly different shade than the accessories, there is nothing to worry about. On the contrary, the play of shades can be a successful design solution and give the cladding a unique style.
But it is bad if the ordinary panels themselves have a different shade. This is permissible only if the combination of shades conceived in advance, a composition developed, where each shade assigned a certain place and the required number of panels of the corresponding colors purchased.
Do-it-yourself basement siding installation
There are two ways to mount plinth siding: with snap locks and with vinyl pins. The difference between them is significant.
Installation with latches. In principle, such locks resemble vinyl siding fasteners, although there are tangible structural differences between them. There is a hook at the bottom of the plinth siding bent towards the wall. At the top of the panel the counterpart of the lock, where the hoo inserted. Siding with such a lock mounted from the bottom up. Install the first panel. The hook of the second panel inserted into a second lock member located at the top of the first panel. The panel pulled upwards how to install vinyl siding. The procedure is similar to installing vinyl siding.
Vinyl pin mounting (spike-in-groove). This method used to install a variety of basement panels that do not have latches. Such panels have a different type of fastening. Instead of a hook, they have vinyl pins at the bottom. In the upper part of the panels, there are sockets corresponding to the size of the pins. Such material mounted in the opposite order of fixing the panels with latches. Panels on vinyl posts mounted from top to bottom. The top panel mounted first. Then, the pins of the next panel inserted into the slots located in its lower part.
How to properly install basement siding
Basement siding appeared later than other types of this facing material. Manufacturers have tried to modernize the panels and equip them with devices that make the installation process as easy as possible.
On the upper right side of the “scale” siding there is a scale indicating the ambient temperature. It has mentioned more than once that siding, like any solid body, increases from heat and shrinks under the influence of cold. This property associated with the need to leave gaps between the panels, and also not to attach it too tightly to the base. Depending on the temperature at which the siding is installed, the width of the gaps adjusted.
Basement scale
With basement scale siding, the task is simplified. No need to make calculations yourself. Smart panels will do everything for you. The scale indicators tell you with what overlap to install the panel: you just need to align the edge of the panel with the corresponding line of the scale.
Shingles panels are even more perfect in this respect. In addition to the temperature scale, they have a thermometer that shows the temperature of the panel itself.
This is an important addition. The fact is that the ambient temperature does not always correspond to the degree of heating or cooling of the siding itself. For example, if the panels stored in a well-heated room, and for installation, it taken out in the cold, it simply will not have time to shrink in accordance with the ambient temperature. To adequately determine the degree of change in the size of the panel, you need to know its own temperature. This is where the appropriate scale comes to the rescue.
One more detail should note. Installation takes more than one hour. During this time, both the air temperature and the temperature of the siding itself change. Consequently, each panel set to the scale division that the thermometer points to at that particular moment.
If two scale divisions simultaneously displayed on the thermometer, they guided by what brighter. With the same brightness, the average value between these two divisions chosen and the panel joined along with it.
Plinth siding finishing step by step instructions
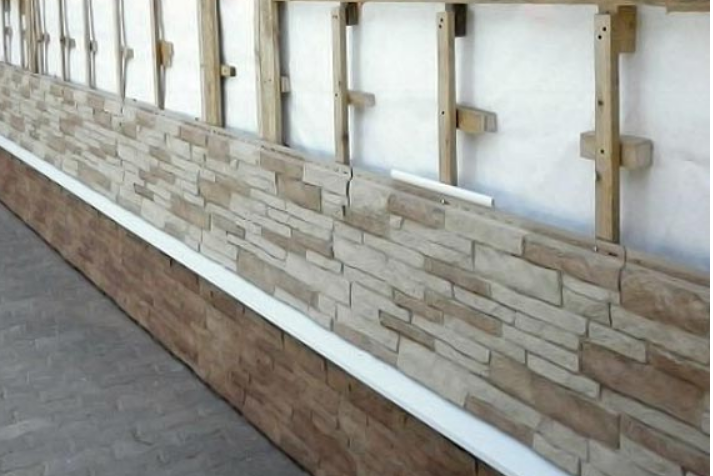
Installation of basement siding begins with the standard preparatory steps. They install a crate, arrange heat and waterproofing, and attach a counter-lattice.
As for the crate, experts differ on this issue. Some insist that it is better to make a vertical lathing with cells 30-40 cm wide. The main argument in favor of this design the better ventilation of the space between the siding and the wall compared to the horizontal lathing.
Others believe that the best option is a horizontal crate of bars located at a distance of about 23 – 25 cm.
The direction of joining the basement siding panels depends on the location of the fastening. It can carry out both from left to right and from right to left. Most often “scales” are mounted from left to right, and “shingles” from right to left. However, this is only a tradition, not a strict law, so the manufacturer can change this order at his discretion. To determine where to start attaching the panel, you need to look at its nail strip. There will be three holes on it: two oval at the edges and one round between them. This round hole will be the first. Then the fasteners inserted into the adjacent oval holes, and nails or screws not driven in completely.
Basement siding. Thorn-in-groove installation
As is the case with vinyl, plinth siding can be attached not only with latches. Some manufacturers are replacing conventional locks with mounting pins. They are at the bottom of the panel. In the upper part of the panel, on a special vinyl tide, their sockets into which pins inserted during installation. Other manufacturers offer tenon-groove mounting. To secure such a panel, a nail bar (“spike”) inserted into the gap between the back of the panel and a post-pin (“groove”).
Internal corners, as well as window and door openings, made using J-profiles or cornice additional profiles.
Otherwise, spike-in-groove plinth siding mounted in the same way as conventional panels.
When sheathing the cornice, a triangular cut made on the cornice panel at the place of the future fold, then heated with hot air using a construction hairdryer and bent at the corners.